This is the first article of my DIY series I have done with the new house we bought recently.
The house was built in 1980, so it is older than me; it was fully renovated in 2007, and a new pellet heating system was integrated in 2015.
We bought it at the end of 2021, and we knew there was a lot of work ahead, as many things were neglected.
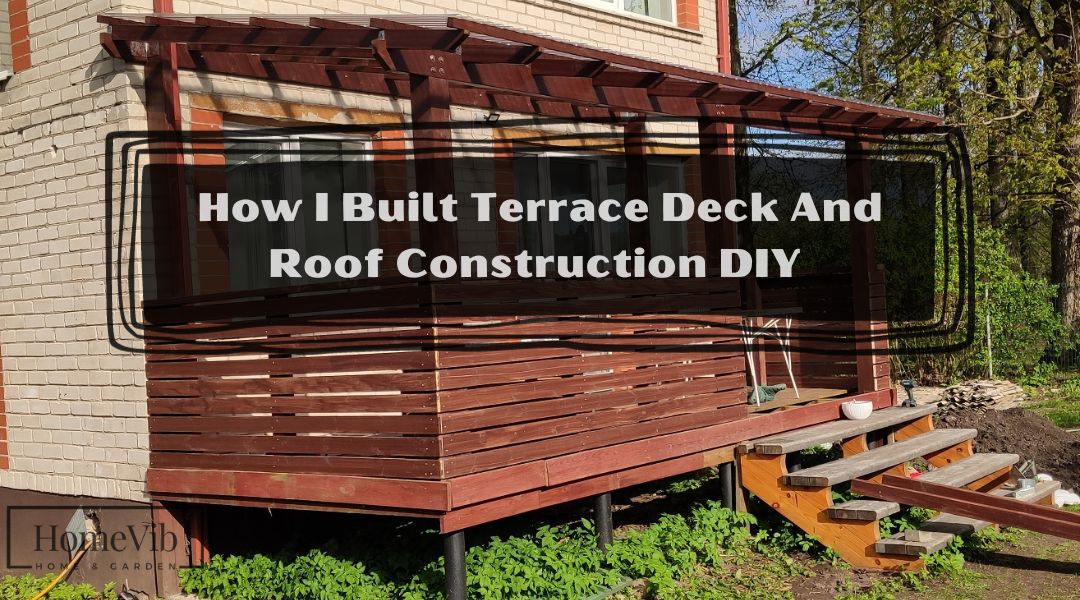
One of the first things in my plan was to renovate the terrace (others call it porch or deck, but I call it terrace).
It looked miserable, with no roof and an old floor. As we have rain quite often, it was a must to build a roof.
Do It Myself Or Not?

As I have lived only in apartments my whole life, I had no experience with terraces. I had no experience at all in any home repair work. All I had done before was screw the furniture and put a shelf on the wall.
So I thought maybe we should hire someone to make a new deck for it, build the roof, etc.
So I called a few local companies, and one asked for 3000 euros (~$3150) just for the roof excluding the deck, and the second asked for 3500 euros (~$3700).
That sounded like a lot of money and too expensive, so I decided to do everything myself.
Preparation – Terrace Construction Drawings

I knew it must be from the wood, but I didn’t know what to use for the roof. So, I saved that for later.
As you can see in the image above, the terrace had stairs in the middle, which didn’t make sense as I couldn’t plan how to design the furniture. So I knew the stairs must be moved to one side.
Terrace dimensions are 2.5x6m (27×64.5 sq. ft.). It’s a bit narrow, but I didn’t want to make a new foundation as the current ones were good. So, the new terrace has the exact dimensions, and I used the existing foundation.
I measured everything and started to make drawings. I use Solidworks and AutoCad daily in my job, so it was an easy task for me.
I first made 3D drawings with Solidworks to ensure everything fit and then put them on paper using Autocad.

As you can see, it looks basic without fancy design elements, but the main thing was to be sure everything fits and dimensions are correct so it is easier for me to do woodworking later.
Terrace Roof Construction Materials And Their Costs

All my wood materials are pine trees with strength class C24 except the side of the railing, which I made from C16 class timber.
I used 145x145mm planed wood for posts – 134 euros ($141).
For beams – 145x45mm each 6 meters long planed wood – 50 eur ($52.5).
Rafter – 95x45mm x 3m planed wood – 95 euros ($100).
Lath – 45×45 x 6m unplaned wood – 60eur ($63).
I used 95x95mm planed wood for railing posts, which cost me 65 euros ($68); for the top of the railing, I used 45x120mm planed timber – 46 euros ($48).
And unplaned wood 23x95mm for the side of the railing – 94eur ($100).
Total wood cost me 544 euros ($572).
For wood processing, I used Vivacolor Villa Aqua tintable solvent-based wood preservative for exterior applications. It cost me 60 euros ($63).

For the terrace roof, I chose PVC Trapezoidal roof coverings. The thickness of the PVC sheet is 1.2 mm. I bought 6 sheets with a total price of 303 euros ($318) including delivery.
Metal angles, bolts, screws, and other minor things cost around 50 euros ($52.5), but I don’t remember the exact amount so that’s approximate.
The new deck cost me around 300 euros ($315)
So that’s a total of 1257 euros ($1320).
Building Terrace Roof Construction
I started with the lengthening of timber. I used a handsaw and circular saw for this work. And the drawings I made before. That made my job easy as I knew precisely what length to saw, where to cut, etc.
Then I started painting work. That was time-consuming, and the rain didn’t help me at all. Also, I painted only once and thought I would put a second layer after the terrace roof assembly.

I later regretted my decision. That was a huge mistake as painting assembled construction was a nightmare. Well, you learn by doing – next time, I will paint everything before assembling.
With my brother’s help, we assembled posts and beams when the painting was finished. That was a lot of leveling job. But we did it.
Then I put up rafters, and the terrace looked like this.

At this point, the hardest was behind. I installed laths.

I started to make a railing next because my roof’s PVC sheets hadn’t been delivered yet. But as soon as I started the work, PVC sheets were here.
I don’t have pictures of the roof installation work, but that was relatively easy.

Building railing for the terrace was a time-consuming task, and by installing railings, I understood that the deck was a bit skewed.

And inside view.

And the railing is finished.

I made one mistake as the railing was too high, so I had to remove one row of planks. But that was an easy fix.
Installing Terrace Deck

When the terrace roof and railing were ready, I removed the old deck and started to install a new one. I put the grooved side downside.
My idea was to make the terrace easier to clean. Also, I didn’t want gaps, so I installed boards close to each other.

And I got a new friend. Hi Sid!

After installing the deck, I had to paint it, but as the weather was terrible that day, I put it off for another day.
Painting the deck was way more accessible than the terrace roof. I don’t remember exactly what I used for the deck, but I used the same color for roof construction.
Short video after painted deck.

My Thoughts And What’s Next?
I was delighted by the result as that was my first ever such work, and I think I made it pretty good.
What are the pros?
- I saved money. Quite a lot of money.
- We have a roof so that we can sit outside on the rainy day as well, and we have a lot of rainy days, trust me.
Any Cons?
- The roof is made of PVC, so it gets hot on sunny days.
- The deck started to shrink and made gaps. Not large but I don’t like them.
We didn’t use the terrace much during the first summer in our house because we had no furniture. I made terrace furniture a year later, and I will make a post about it soon.
Those gaps below the terrace are now closed with pellets. And all around the terrace are flowers.
I want to install terrace roof curtains and lights, but that’s for the future, at least for now.
This was my first DIY post, and I have no idea how detailed it should be, so drop below a comment on what you think about it or if you have any suggestions.