Homeowners think installing window wells is a hassle because they may need digging. Of course, that is not something that you want to take on. But there are some easy DIY solutions for this. Installing window wells is one of the best solutions for a better coziness and look of your home.
The fact is that installing it is not as complicated as you think and can be quite rewarding if done right. This guide will provide you with the best ways to install window wells.
In installing a window well, there are steps to keep in mind. First, ensure the backfill and window positioning are correct. Second, take precise measurements. Then, prepare a hole. Next is to set up the window well. Remember to add a gasket or sealant and install an anchor. Lastly, fill in the gaps with drainage rock.
Steps To Install Window Well
A window well or an egress window provides an emergency exit to residential houses.
Homeowners build this in their basements to serve as a backup escape route. This is especially in the event of a fire or other disaster. It must conform to specific dimensions and height standards to follow local ordinances. Window wells are larger than regular windows.
You can place it anywhere in the basement, depending on the design of the space. With suitable basement egress windows, your basement might feel like a part of your home. Also, it makes your property safer, and installing it can increase its resale value.
A window well can be easily installed. Let’s walk through this step by step.
Step 1) Calculate how big of a window you’ll need as an emergency exit and window positioning are correct.
Different areas have different regulations. Thus it’s essential to research the laws in your area. For example, the size should be around 6 square feet (0.56 square meters). And the sill should be at most 44 inches (110 centimeters) above the floor.
A window well is optional by law in every basement bedroom. Bedrooms in the basement are not permitted unless they have their bathroom.
Get any necessary building permits before beginning the project. To avoid damaging utility lines, you will need to seek an inspection. First, you need to inquire about the local utility providers. Then get clearance before beginning any digging.
Step 2) Take exact measurements of where you will place the window.
A minimum of 36 inches (91 cm) in width is necessary, as is an extra 36 inches (91 cm) beyond the planned window opening. In addition, it must be no more than 44 inches (110 centimeters) in depth.
The depth of the hole should be at least 44 inches (110 centimeters) but no more than 6 inches (15 centimeters). It should be deeper than the planned depth of the window’s sill.
Most building rules will allow you to install a window even if you have to dig the well deeper than 44 inches.
Step 3) Begin by making a small hole directly beneath your target cutting line.
Put in a concrete drill bit with enough length to penetrate the wall. When drilling into a wall, take extra care to ensure the drill is absolutely level.
To identify the window from the outside, you’ll use the pilot hole as a pinpoint. For this reason, make sure the drill is horizontal.
If the window is perpendicular to the floor joists, you need a frame to hold it. Place the studs under the joists, and then screw the top plate to the joists using the predrilled holes.
Repeat this process until you have penetrated the wall around the window by about half. The groove you created will guide you, allowing you to put more force into the cut and go deeper. To protect the outside space you will be cutting in, lay a sheet over it.
Step 4) Fit the window in place and secure it.
The top center should be your first focus as you move outward. Take care to avoid moving the remaining blocks.
If there are obstructing elements, try chipping away at their centers first.
Put hammer pressure on a brick chisel and tap it along the edges. Check that the opening is big enough to fit the window frame and window.
Put newspapers into the blocks first to prevent the concrete from seeping through. Then, pour concrete into the blocks on top of the newspaper and smooth the surface with a trowel. Use plastic to prevent moisture from penetrating the concrete.
Put screws through the top of the frame and into the ceiling plate or joists. Secure the frame’s side rails to the concrete walls with concrete screws.
Step 5) Seal the frame and walls by applying a gasket and sealant.
Create a watertight seal with polyurethane caulk or similar outside caulk. Put a bead in the space between the window frame and the walls to keep water out.
Before caulking any gaps bigger than 4 in (0.64 cm), you can use a foam backer rod. Then you can dismantle the makeshift framework you erected. The joists will rest on the window frame you put in. The first step is to remove the screws holding the frame to the joists. After that, you can disassemble the rest of the structure by laying the frame flat.
To install a window, lift it into the frame and fasten it in place as instructed.
Step 6) Add drainage rock to the bottom of the window well once it has been securely fastened into place.
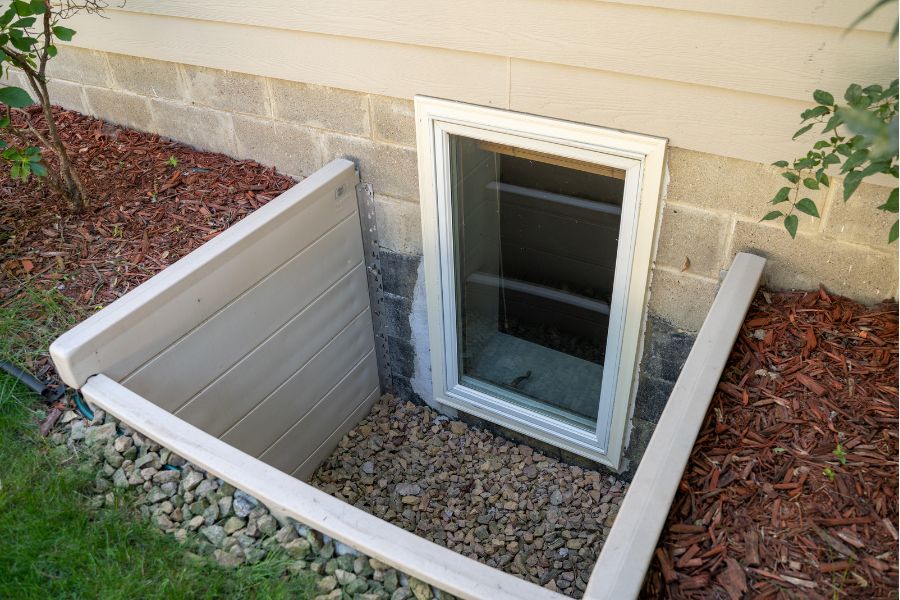
For this purpose, a wide variety of drainage rock is available. You can use drainage rock to prevent water from collecting in the window well. This serves to filter the liquid into the ground below.
Dig down into the base of the window well and attach a PVC pipe that leads outside to the house’s drainage system. Use around 2 inches (5.1 centimeters) of gravel to cover the bottom of the window well for drainage purposes.
You may dig a hole to avoid connecting the window well to the outside drainage system.
Start filling in the dirt around the window’s exterior well so it is even with the rest of the ground. Then, check the window to see if you apply the coating for protection.
Lastly, a ladder in the window well is advisable for safety reasons. It may be necessary if the well is particularly deep.
Should the Window Well Be Attached To Foundation?
You should attach your window wells to your home’s foundation.
In most cases, this serves to ensure the safety of those involved. But your window wells may have to withstand severe weather conditions. It will depend on where you live.
Everyday use will take its toll on your window wells. If you anchor the window wells to the house’s base, it will go over much better.
Other options include doing drainage work or having a submersible pump. Your window wells will deteriorate due to the effects of time and use. Attaching the window wells to the house’s foundation will improve its reception.
The 2012 International Residential Code (IRC) mandates that the well has proper drainage. So well, flooding shouldn’t be an issue if it’s set up correctly according to these regulations.
Thus, attaching window wells to the foundation is advisable for these building codes.
What Is the Best Material For a Window Well?
The best material for a window well is concrete material.
Investing in covers made of sturdy, rust-proof materials is a good idea. It is because they will last longer and prove well worth the money.
Metals like aluminum and steel are commonly used for window well grates. Whereas plastics like polyethylene and polycarbonate are more common for window well covers.
Concrete
Some basements are below ground level and often have concrete window wells. Go with a concrete block window well if you want to feel safe for years to come.
You can rely on its superior durability and extended lifespan. It’s more expensive but will last a very long period without needing replacement.
Corrugated Steel
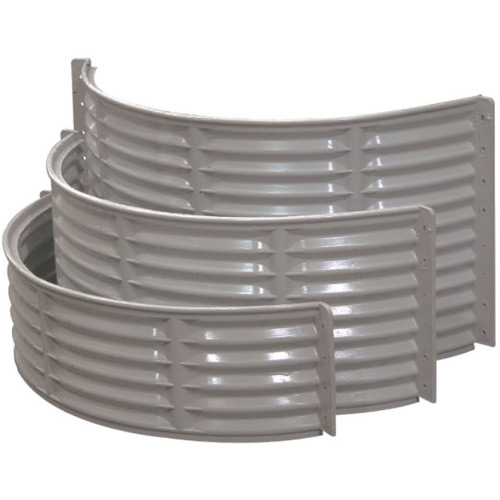
The standard is wells are usually made of corrugated steel. Due to their galvanization, these are durable from rust and last a long time.
Plastic

Wells, made of heavy-duty plastic, is the most long-lasting alternative to steel. This durable material is specifically to resist rust and dents for long service life.
Fiberglass
Fiberglass is durable and versatile in its aesthetic qualities. Sunlight, water, dirt, and other elements have little effect on fiberglass.
Some walls feature built-in shelves or niches where you may display plants. They are lightweight and simple to set up, but the added convenience comes at a higher price.
How Much Does It Cost To Install Window Wells?
The national average cost of installing a window well can range from $2,500 to $5,300.
These will include the cost of the well itself. Any necessary materials and the cost of attaching them to your drainage system may vary.
The average time to complete this installation is under 4 hours. You may customize the look of your basement window. You can pick from a variety of colors, textures, and designs. One of the primary cost determinants when buying one is the model you select.
Single-Hung Egress Window

Single-hung egress windows typically range in price from $100 to $400. So it makes them the most budget-friendly option. A legitimate egress window should be at least 20 inches by 24 inches in size.
Horizontal Egress Window
Because of their size, they work best in the most spacious areas of your home, such as the living room or family room. The average cost of a horizontal egress window is $300.
Casement Egress Window
You should expect to pay anywhere from $250 to $500 for a double-hung egress window. This is because double-hung egress windows are indistinguishable from their single-hung counterparts.
In-Swing Egress Window
To construct a well that only satisfies requirements, you only need a door that swings inward. Costs for currently available versions might be anything from $350 to $700.
Awning Egress Window
A massive window well would need to be dug to fit the outwardly opening window. Egress windows with an awning typically run between $600 and $800.
How Deep Should Window Wells Be?
A window well should be 6 inches wider than the window itself and 8 inches deeper than the windowsill.
Make sure your structure is a “single-family house” with no more than three levels above ground. As a result, if your building is going to be taller, you will require more dwelling units.
You will have to follow the International Building Code with stringent requirements.
Egress Regulations by the IRC
All egress windows must meet the following four International Residential Code (IRC) criteria. But specific requirements may vary by locality and state:
- The 20-inch-wide doorway is the bare minimum
- The opening must be at least 24 inches high.
- The minimum clear opening size is 5.7 square feet
- Maximum height of 44 inches above the finished floor for window sills
There should be no need for keys or tools to open the window from the inside. Any bars, grilles, or grates placed over windows must be easily opened without using tools or keys. Yet still allow a clear opening of at least 5.7 square feet.
How To Keep Animals Out Of Window Wells?
You can install a plastic cover over the window well to prevent animals from getting stuck.
When using a metal cover, please put it in a grate to prevent smaller animals from falling through.
Put a narrow board or piece of cardboard against the top of the window well. This provides a ramp for rodents or animals to use as you lower it.
Ensure there are no spaces between the wall and the lid of the well that animals could use to get access.
Installing these coverings will also allow natural light to enter your basement. You can maximize the window well’s security without sacrificing natural light.
Do You Need Drainage In a Window Well?
Yes, you need a drainage system before installing a window well.
The standard depth for this hole is around 1 foot below the window sill. You should plan a drainage system before the window well’s installation. After all, water will eventually accumulate if you leave that huge hole on the side of your house.
Your home’s foundation will thank you for investing in efficient drainage. Although it may be costly, installing drains and culverts is essential. It channels water away from your home and into a storm drain.
In colder climates, frozen water can cause significant damage to your home’s structure. In addition, mold can grow in the presence of even a trickle of water. You could become dangerously ill if neglected for too long.
What Do You Put In The Bottom Of a Window Well?
You can put gravel and rocks at the bottom of your window well.
Putting gravel at the bottom of a window well is a popular practice for facilitating water flow. Rather than letting the water pool in the soil near the window, the weeping tile system will absorb it.
If you want to prevent water from gathering around your home’s foundation, a few inches of gravel can help. It’s a low-cost but efficient method of separating the window well from the interior of your home.
Keep in mind
Gravel is an essential component for building a window well. Gravel may improve drainage. Spread gravel in the window well two or three inches deep. If the gravel isn’t spread out evenly, use your shovel to compact it and move it.
Should I Put Rocks In My Window Well?
Yes, it’s a good idea to decorate the window well with rocks.
Putting rocks in window wells can prevent debris from entering the tile system. The rock-filled, mud-free vertical drain is mandatory. Covering the window well with rocks will make it look better.
Stones are cheap, attractive, and practical in many ways. They help drainage and boost curb appeal. And can even serve as a deterrent against intruders thanks to the sound they make when stepped on.
There is no absolute lower limit for the amount of rock you can place on the window well. But too much rock can increase the likelihood of flooding and window damage.
How Can I Make My Window Well Look Better?
You can make your window well look better by hanging plants and decorating with flowers. At the same time, you can customize it with wood and bricks.
Plants
Hanging plants from an egress window well is an easy and inexpensive solution. It also improves the view from the inside. If you decide to decorate with plants, ensure none of them will prevent the window from opening.
Flowers
The right plants and flowers can give it a touch of rustic elegance. If you want to improve the view from the inside, stack some planters in the window well. Then fill them with bright flowers.
Wood and Bricks
It’s common for woods to become an integral part of the surrounding landscape. It makes a more relaxing and enjoyable view. Wood is also flexible, so you can design unique features like the steps below to get out of the well. At the same time, bricks can add a touch of class to your home’s exterior.


