The reason why your faucet is still running when turned off can be attributed to several factors.
By examining the different components and potential causes, such as worn-out washers, faulty O-rings, or corroded valve seats, you can effectively address the problem and prevent further water loss.
This article will explore these common causes and provide step-by-step solutions to fix a running faucet.
Why Is the Water Still Running Even If It Is Shut Off?
Now that we have a basic understanding of faucet mechanics, let’s explore some of the common causes behind a faucet that continues to run even when it’s shut off.
-
Worn-out Washer
Over time, the washer inside the faucet handle can deteriorate or damage it, resulting in a faulty seal. As a result, water may continue to seep even when the faucet is closed.
-
Faulty O-ring
The O-ring, a small rubber ring, helps create a watertight seal between the spout and the faucet body. If the O-ring is worn, cracked, or incorrectly positioned, it can lead to water leakage and a running faucet.
-
Corroded Valve Seat
The valve seat is the connection point between the faucet and the spout.
If it becomes corroded or damaged, it can prevent the faucet from closing correctly, allowing water to continue flowing.
-
High Water Pressure
Excessively high-water pressure can strain the faucet’s internal components, leading to leaks and continuous water flow.
-
Malfunctioning Cartridge
If the cartridge becomes damaged or worn, it can result in a running faucet. Replacing the cartridge with a new one specific to your faucet model can resolve this issue.
-
Plumbing System Issues
Sometimes, the problem may not lie within the faucet but in the plumbing system. Issues such as a faulty shut-off valve, a malfunctioning water pressure regulator, or a problem with the main water supply line can affect the functionality of your faucet.
How To Examine Faucet?

Here’s a guide on how to examine a faucet and ensure its proper functioning:
- Turn off the Water Supply: Look for shut-off valves beneath the sink and turn them clockwise to shut off the water flow. If you can’t locate the shut-off valves, consider temporarily shutting off the main water supply to your home.
- Inspect the Exterior: Look for any visible signs of damage, such as cracks, chips, or discoloration. Pay attention to the handles, spout, and other components for signs of wear or loose parts.
- Check for Leaks: A small, slow leak can indicate an underlying issue. Run your fingers along the base of the faucet and underneath the sink to check for moisture.
- Test the Handles: If you encounter difficulty or stiffness while turning the handles, it may indicate a need for lubrication or repair.
- Test the Water Temperature and Flow: Turn on the hot and cold handles and check the water temperature. Ensure that the hot water comes out from the designated handle and the cold water from the respective handle.
- Listen for Unusual Sounds: While the water is running, listen for any unusual sounds, such as rattling, grinding, or hissing, that may indicate loose or damaged components within the faucet.
- Examine the Drain: Look for any signs of water pooling or slow drainage, as this could suggest a clogged drain or a faulty drain assembly that needs to be addressed.
How Do You Fix a Water Faucet That Won’t Turn Off?
The followings are the guides and processes for fixing different types of faucets to regain control over the water flow.
We offer comprehensive faucet support, from identifying the kind to providing step-by-step solutions.
How To Fix A Ball Faucet?
When it comes to fixing ball faucets, the following steps can help you resolve the issue:
1. To fix a ball faucet, you’ll need a set of Allen wrenches, an adjustable wrench, and replacement parts like O-rings, springs, and a new ball.
30-Piece Premium Hex Key Allen Wrench Set
2. Before starting any repairs, turn off the water supply using the shut-off valves beneath the sink.
3. Locate the set screw on the handle and use an Allen wrench to remove it. Once the screw is removed, carefully take off the hold by pulling it straight up.
4. Using an adjustable wrench, loosen and remove the cap and collar, exposing the ball assembly.
5. Examine the ball assembly for any signs of wear or damage. Replace any worn-out O-rings, springs, or balls with new parts. It’s advisable to bring the old parts to a hardware store to ensure you get the correct replacements.
6. Place the new ball, springs, and O-rings back in their appropriate positions. Reassemble the faucet by following the steps in reverse order, tightening the cap and collar assembly, and securing the handle with the set screw.
7. Once everything is reassembled, turn on the water supply and test the faucet. It should now operate smoothly and turn off completely.
How To Fix a Disk Faucet?
To fix a disk faucet, follow these steps:
- To repair a disk faucet, you’ll need a set of Allen wrenches, an adjustable wrench, a flathead screwdriver, and replacement parts such as new seals and springs.
- Turn off the water supply by locating the shut-off valves beneath the sink.
- Locate and remove the set screw on the handle using an Allen wrench. Please take off the handle by lifting it straight up.
- Use an adjustable wrench to loosen and remove the metal bonnet above the cartridge assembly. Once the bonnet is removed, you can access the disk cartridge.
- Examine the seals and springs within the cartridge assembly. If you notice any wear, cracks, or deterioration, replace them with new seals and springs. Using the correct replacement parts specific to your faucet model is essential.
- Place the new seals and springs into the cartridge assembly, ensuring they are properly aligned. Reinstall the cartridge assembly, followed by the metal bonnet. Tighten the bonnet securely.
- Place the handle back onto the faucet and secure it with the set screw using an Allen wrench.
- Finally, turn on the water supply and test the faucet. It should now operate smoothly, and you should be able to turn it off completely.
The specific steps may vary depending on the manufacturer and faucet model.
How To Fix A Cartridge Faucet?
To fix a cartridge faucet, follow these steps:
- You’ll need a set of Allen wrenches, an adjustable wrench, and replacement parts like a new cartridge and O-rings.
- Shut off the water supply using the shut-off valves beneath the sink.
- Using an Allen wrench, Locate and remove the handle’s set screw. Lift the handle straight up to detach it from the faucet.
- Use an adjustable wrench to loosen and remove the cartridge retaining nut. Once the nut is removed, pull out the cartridge carefully.
- Examine the cartridge for any signs of damage or wear. If necessary, replace the cartridge with a new one that matches your faucet model. Also, replace the O-rings on the cartridge and the faucet body to ensure a proper seal.
- Insert the new cartridge into the faucet body, ensuring it fits securely. Reinstall the cartridge retaining nut and tighten it with the adjustable wrench. Place the handle back on the faucet and secure it with the set screw.
- Turn on the water supply and test the faucet. It should now operate smoothly and shut off completely.
Remember that cartridge faucet can vary in design, so refer to the manufacturer’s instructions if available.
How To Fix A Compression Washer Faucet?
Compression washer faucets are the traditional type with separate hot and cold handles. To fix this type of faucet, follow these steps:
- You’ll need a flathead screwdriver, an adjustable wrench, and replacement parts such as new washers and O-rings.
- Shut off the water supply by locating the shut-off valves beneath the sink.
- Use a flathead screwdriver to remove the decorative caps covering the handle screws. Unscrew the handles and remove them by lifting them straight up.
- With the handles removed, you can access the valve stems. Use an adjustable wrench to loosen and remove the packing nuts holding the valve stems.
- Inspect the washers and O-rings on the valve stems for signs of wear or damage. Replace any worn-out parts with new washers and O-rings.
- Insert the new washers and O-rings onto the valve stems. Reinstall the valve stems and tighten the packing nuts securely. Place the handles back onto the stems and screw them in place.
- Turn on the water supply and test the faucet. It should now operate smoothly, and you should be able to turn it off completely.
How Long Should Water Run After Turning Off Main Valve?

Here’s a general guideline to follow:
- Single-Story Home: Let the water run for around 5 minutes for a single-story home is usually recommended. This allows enough time for the water to flush out of the pipes and for any remaining water to drain from the faucets.
- Multi-Story Home: In the case of a multi-story home, the process may take longer due to the additional floors and the vertical distance water needs to travel. Letting the water run for 10 to 15 minutes in this scenario is recommended.
- Long Water Pipes: If you have particularly long water pipes or your home is situated at the end of a water line, it may take longer for the water to drain thoroughly. In such cases, letting the water run for 15 to 20 minutes or even longer is advisable, ensuring all the water is flushed out.
It’s important to note that the above durations are general recommendations. Factors such as the size of the plumbing system, pipe insulation, and local water pressure can affect the required flushing time.
What To Do If the Main Water Valve Won’t Shut Off?
First, inspect the valve for any obstructions hindering its proper closure. Clear away any debris, dirt, or mineral buildup blocking the valve’s movement.
If the valve is only partially closed and water is still flowing, try applying gentle pressure in the opposite direction to close it entirely. Avoid using excessive force to prevent damaging the valve.
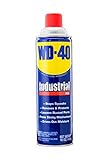
Additionally, if the valve is stiff or difficult to turn, applying a lubricant like WD-40 or a silicone-based lubricant can help loosen it.
WD-40 Multi-Use Silicone Lubricant
Apply the lubricant to the valve stem and carefully turn the valve back and forth to distribute it. Using a wrench for extra leverage might help if the valve remains uncooperative.
Place an adjustable wrench on the valve stem and turn it clockwise to close it, taking care not to overtighten and risk causing damage.
If none of these steps works, it’s time to seek assistance from a professional plumber with the expertise and specialized tools to handle more complex valve issues.
Finally, if all else fails, you can locate the water meter and shut off the water supply at that point as a last resort.
Remember that this may require a unique tool provided by your water utility or the help of a plumber.


